
Submitting Written Assignments
To submit a written assignment, follow this procedure:
- Copy the question(s) or other required materials from the assignment page into a new Microsoft Word document.
- Answer the question(s) or do the assigned work, writing with proper citations.*
- Format the document according to the prescribed style.*
*Most Bible and General Studies courses require you to observe MLA style. Some business, education and psychology courses instead require APA style, since that is the style common to those fields.
- Save the document in the default format from Microsoft Office 2007 or later. This means that acceptable formats are as follows:
- .docx for Microsoft Word
- .pptx for Microsoft PowerPoint
- .xlsx for Microsoft Excel
Whether you are able save in these formats or not, at least be sure that you are able to open and read documents which are saved in these formats. When your instructors comment on your written assignments, they may be returned to you in these formats.
- After you have saved your document, go back to the assignment page and scroll down to the bottom to see the upload option. Take note that the assignment due date is indicated (fig. 1-A below) along with a countdown to the due date (fig. 1-B below).

Figure 1
- When you are ready to turn in your work, click on the "Add submission" button at the bottom of the "Submission status" section. When you do this, that section will change to a "File submissions" section (fig. 2 below). Moodle 2 offers a very robust group of upload methods and options, but the simplest of all is the drag-and-drop action. To accomplish this, first navigate to the folder which contains your document on the computer you are using. Locate your file, then use your left mouse button to click and drag the file from the folder into the designated area in the "File submissions" section (fig. 2-A below).
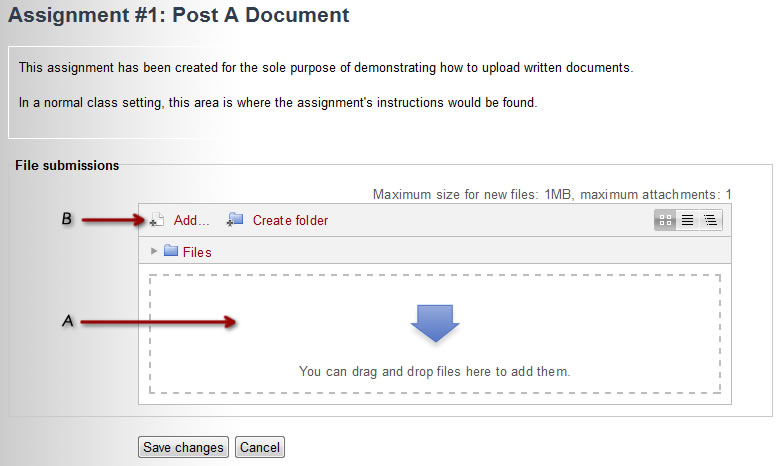
Figure 2
If you would rather
browse to your file from within the Moodle structure provided, click on the "Add..." button instead (fig. 2-B above). Doing so will bring up a new dialog box like the one below (fig. 3).
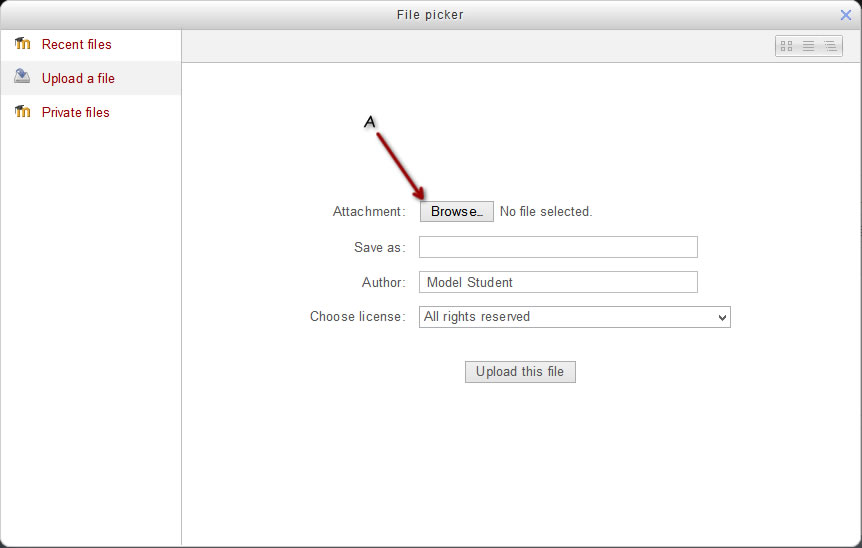
Figure 3
- Click on the "Browse..." button (fig. 3-A above). This will bring up a dialog box showing files on the computer being used. It will look something like this:
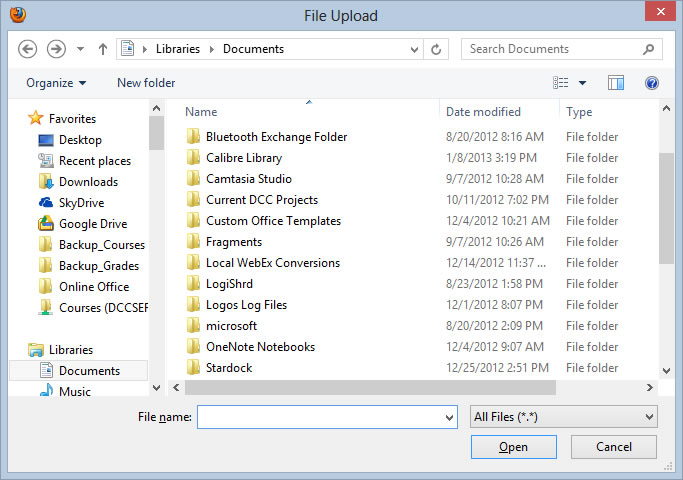
Figure 4
- Navigate to where your completed assignment file is located and select the file, then click on the "Open" button (fig. 5 below).
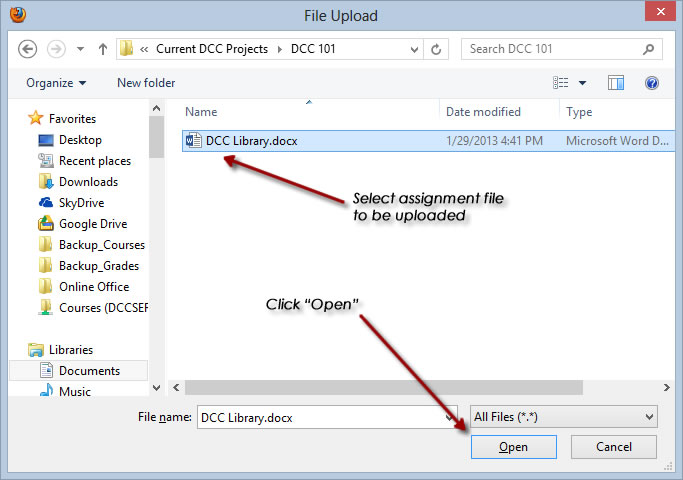
Figure 5
- When you do this, the "File Upload" box will disappear and you will be brought back to the "File picker" box in Moodle. Notice that your selected file name is now present next to the "Browse..." button (fig. 6-A below). You have the ability to rename your file here if you wish (fig. 6-B below), but you do not need to if such action is not necessary. Click on the "Upload this file" button at the bottom to upload your assignment file (fig. 6-C below).
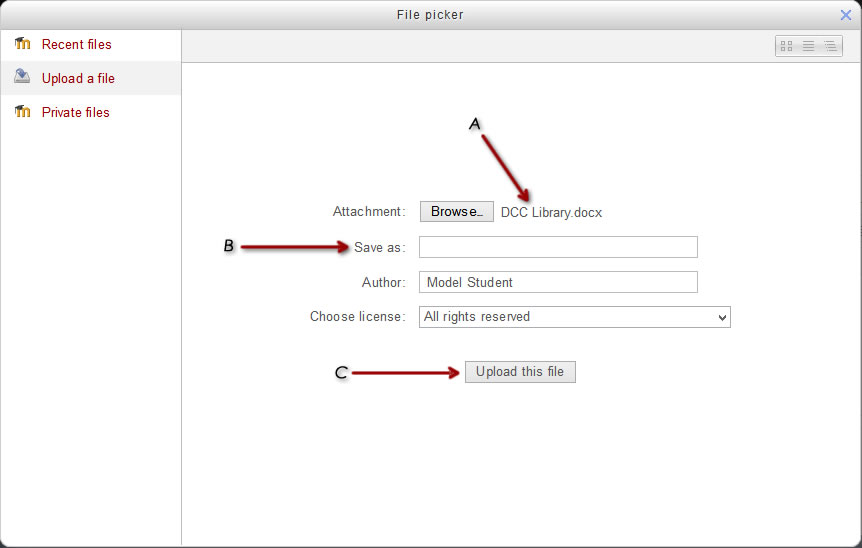
Figure 6
- After clicking the "Upload this file" button, your uploaded file should show up in the "File submissions" box on the Moodle assignment page (fig. 7-A below). If it shows up and you are sure that you are submitting the correct file, click on the "Save changes" button at the bottom of the page (fig. 7-B below).
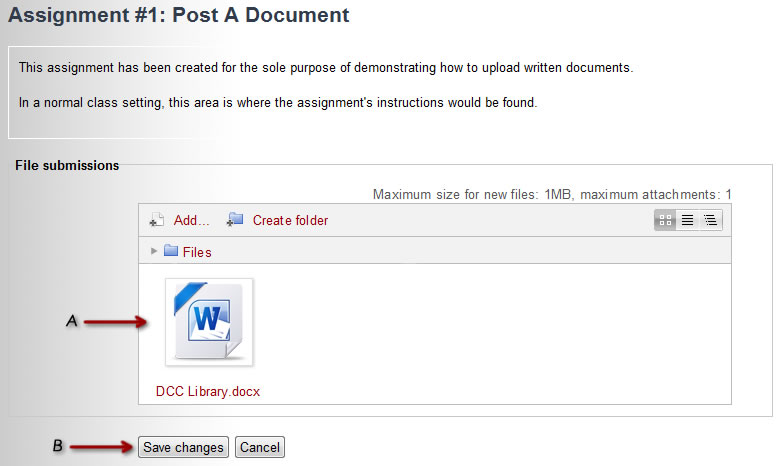
Figure 7
- If you have done everything correctly, you will be presented with a screen which looks like this:
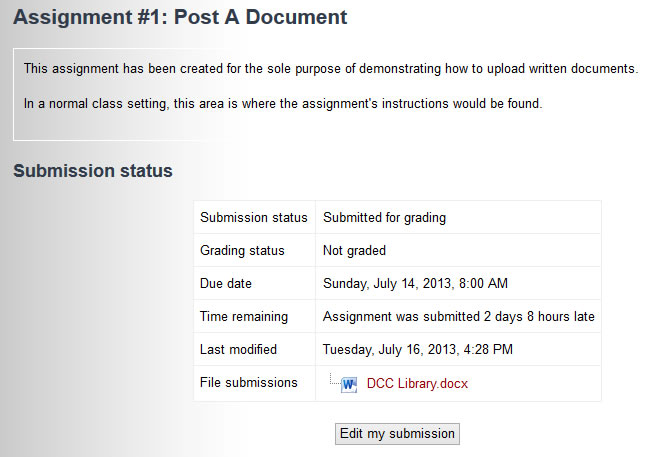
Figure 8
At this point, no further action should be necessary on your part unless your instructor informs you otherwise.
- Once your instructor has graded your submission, you will see a screen like this when you go back to the assignment:
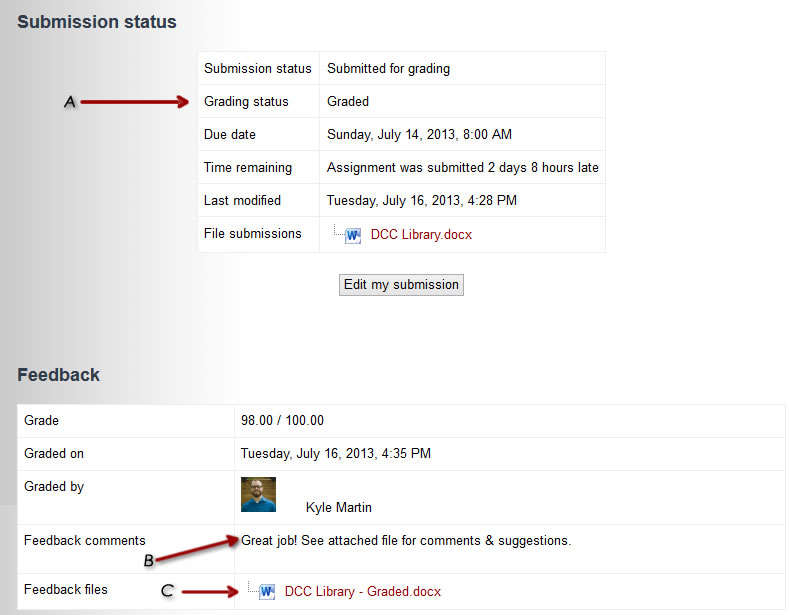
Figure 9
Notice that the Grading status has changed to "Graded" (fig. 9-A above). If your instructor has left any general comments or uploaded a response file, you will see them at the bottom of the "Feedback" section (fig. 9-B and 9-C above).

Rev. 07.16.13